Setup Api Server (React Native)
Prerequisites
Before getting started, you have an active Firebase, Hasura and Vercel project. If you do not meet these prerequisites, follow the links below:
React Native - Setting up the development environment
Create a new Firebase project: https://console.firebase.google.com/
Guide config firebase project: https://rnfirebase.io/
Create a new Hasura project: https://cloud.hasura.io/projects
Create a new Vercel project: https://vercel.com/new
Guide create Vercel project: https://dev.to/hte305/deploy-express-js-app-to-vercel-38jb
Video Guide Setup Api Server: https://www.youtube.com/watch?v=cFipNeeRphE&t
1. Config Firebase
Installing React Native Firebase requires a few steps; installing the NPM module, adding the Firebase config files & rebuilding your application.
1.1 Install via NPM
Install the React Native Firebase "app" module to the root of your React Native project with NPM or Yarn:
# Using npm
npm install --save @react-native-firebase/app

# Using Yarn
yarn add @react-native-firebase/app
The @react-native-firebase/app module must be installed before using any other Firebase service.
1.2 Android Setup
To allow the Android app to securely connect to your Firebase project, a configuration file must be downloaded and added to your project.
Generating Android credentials
On the Firebase console, add a new Android application and enter your projects details. The "Android package name" must match your local projects package name which can be found inside of the manifest tag within the /android/app/src/main/AndroidManifest.xml file within your project.
The debug signing certificate is optional to use Firebase with your app, but is required for Dynamic Links, Invites and Phone Authentication. To generate a certificate run cd android && ./gradlew signingReport. This generates two variant keys. You have to copy both 'SHA1' and 'SHA-256' keys that belong to the 'debugAndroidTest' variant key option. Then, you can add those keys to the 'SHA certificate fingerprints' on your app in Firebase console.
Download the google-services.json file and place it inside of your project at the following location: /android/app/google-services.json.
1.3 iOS Setup
To allow the iOS app to securely connect to your Firebase project, a configuration file must be downloaded and added to your project, and you must enable frameworks in CocoaPods
Generating iOS credentials
On the Firebase console, add a new iOS application and enter your projects details. The "iOS bundle ID" must match your local project bundle ID. The bundle ID can be found within the "General" tab when opening the project with Xcode.
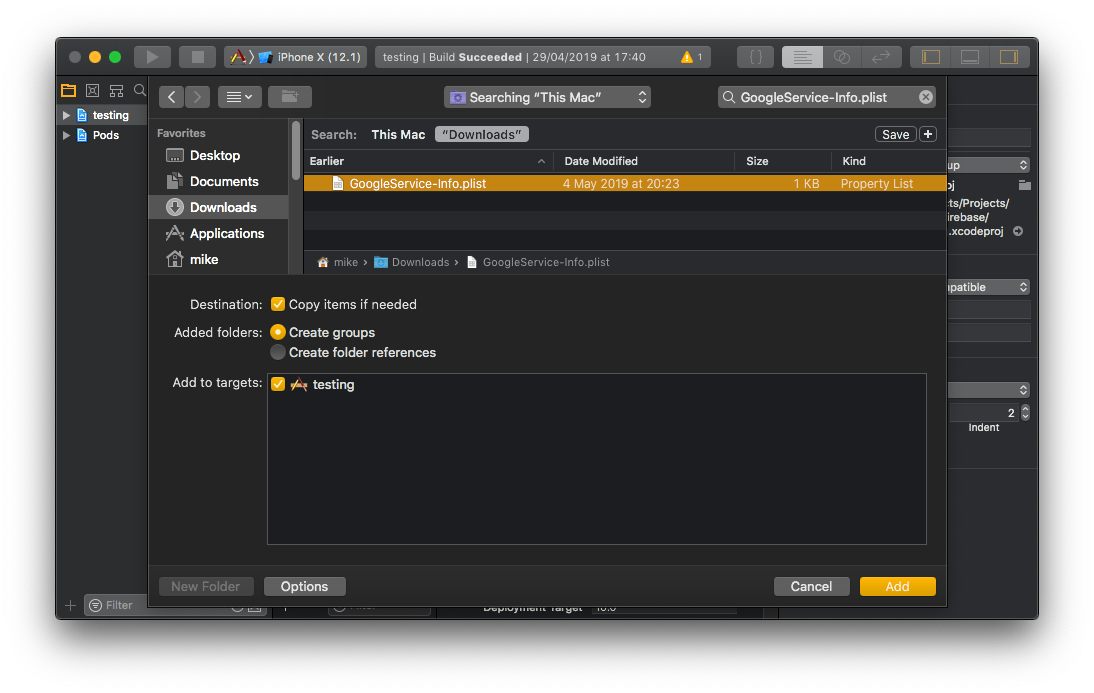
Download the GoogleService-Info.plist file.
Using Xcode, open the projects /ios/{projectName}.xcodeproj file (or /ios/{projectName}.xcworkspace if using Pods).
Right click on the project name and "Add files" to the project, as demonstrated below:

Select the downloaded GoogleService-Info.plist file from your computer, and ensure the "Copy items if needed" checkbox is enabled.
1.4 Autolinking & rebuilding
Once the above steps have been completed, the React Native Firebase library must be linked to your project and your application needs to be rebuilt.
# Android apps
npx react-native run-android

# iOS apps
cd ios/
pod install --repo-update
cd ..
npx react-native run-ios
Once successfully linked and rebuilt, your application will be connected to Firebase using the @react-native-firebase/app module. This module does not provide much functionality, therefore to use other Firebase services, each of the modules for the individual Firebase services need installing separately.
2. Config Database
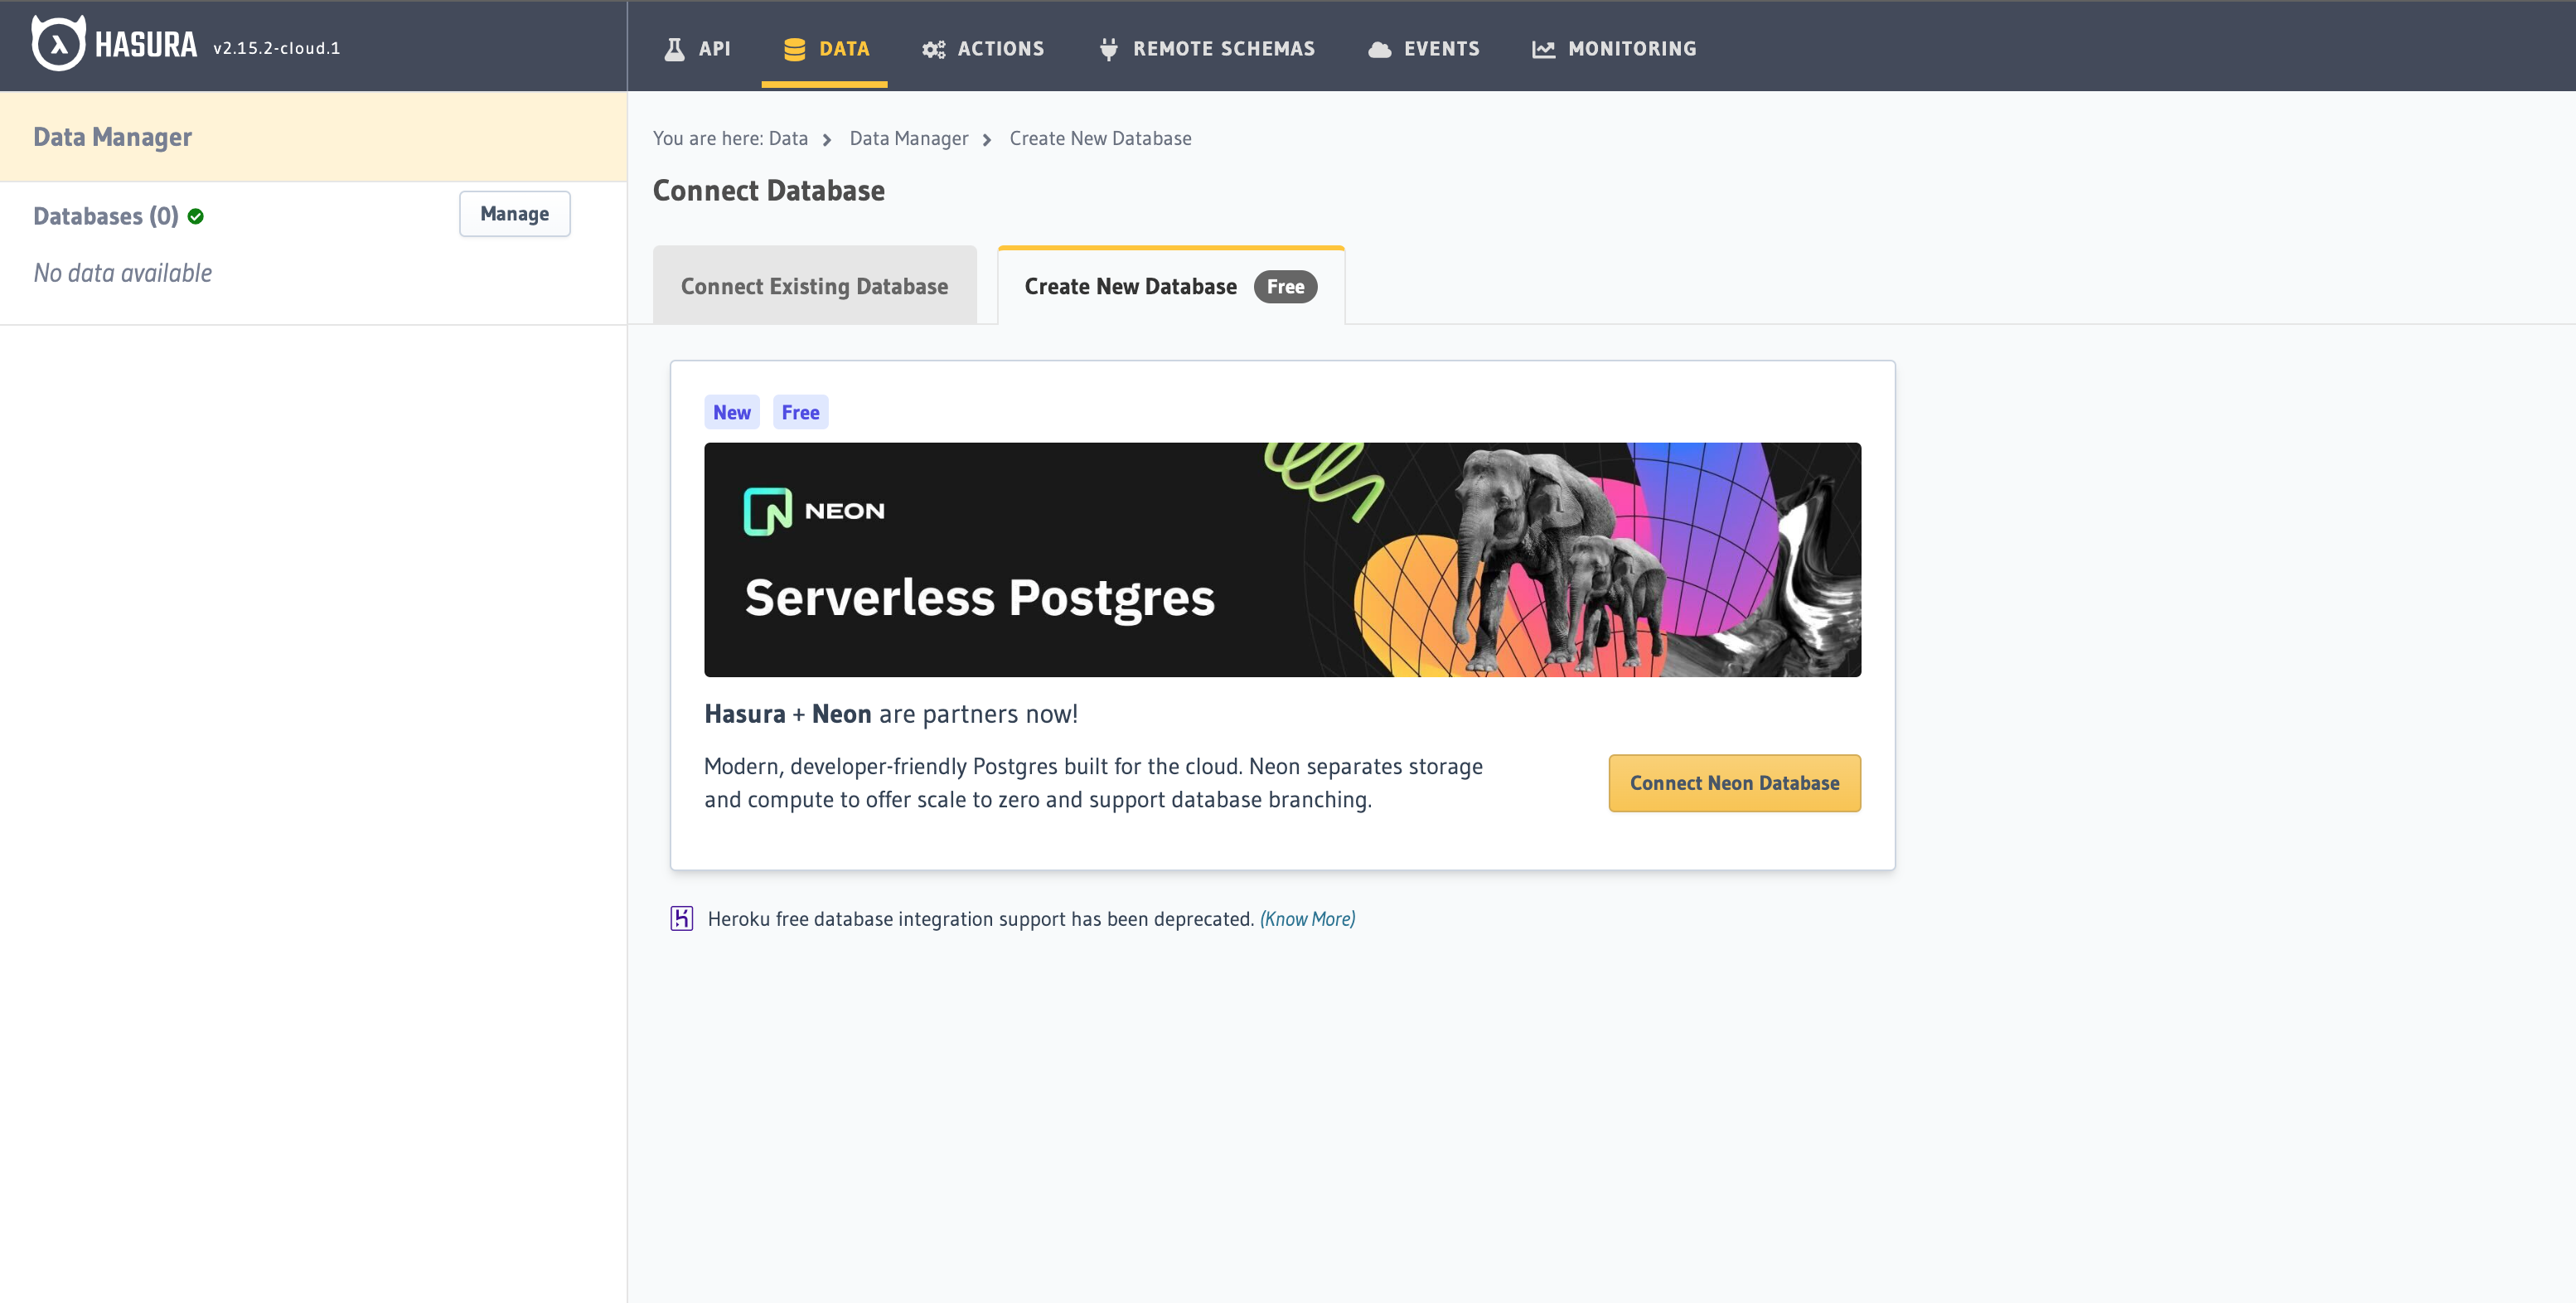
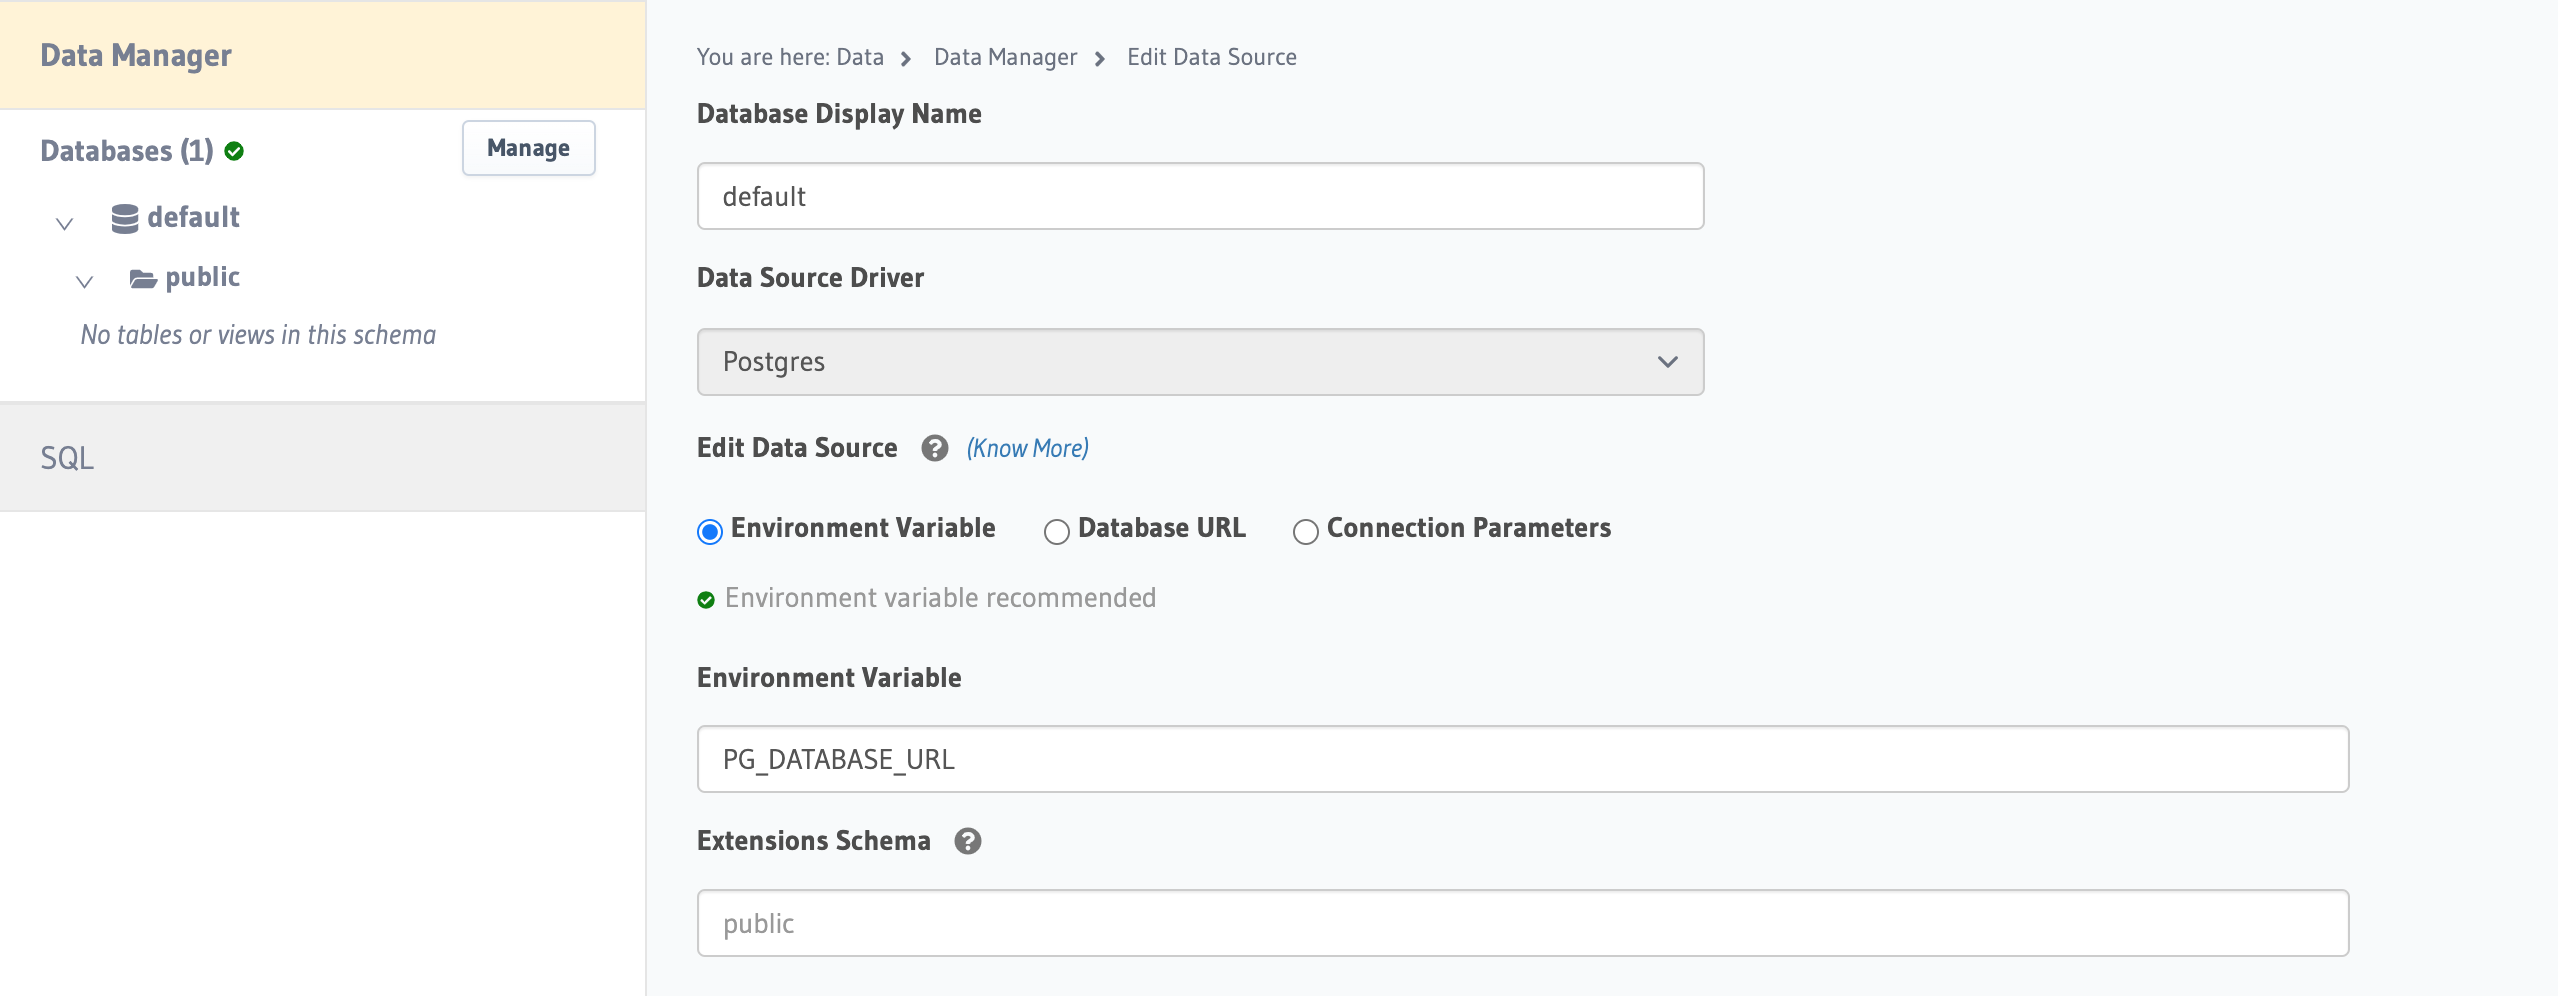
Open hasura project and open the “Data” page, then click “Create New Database (free)”, then create a new database.
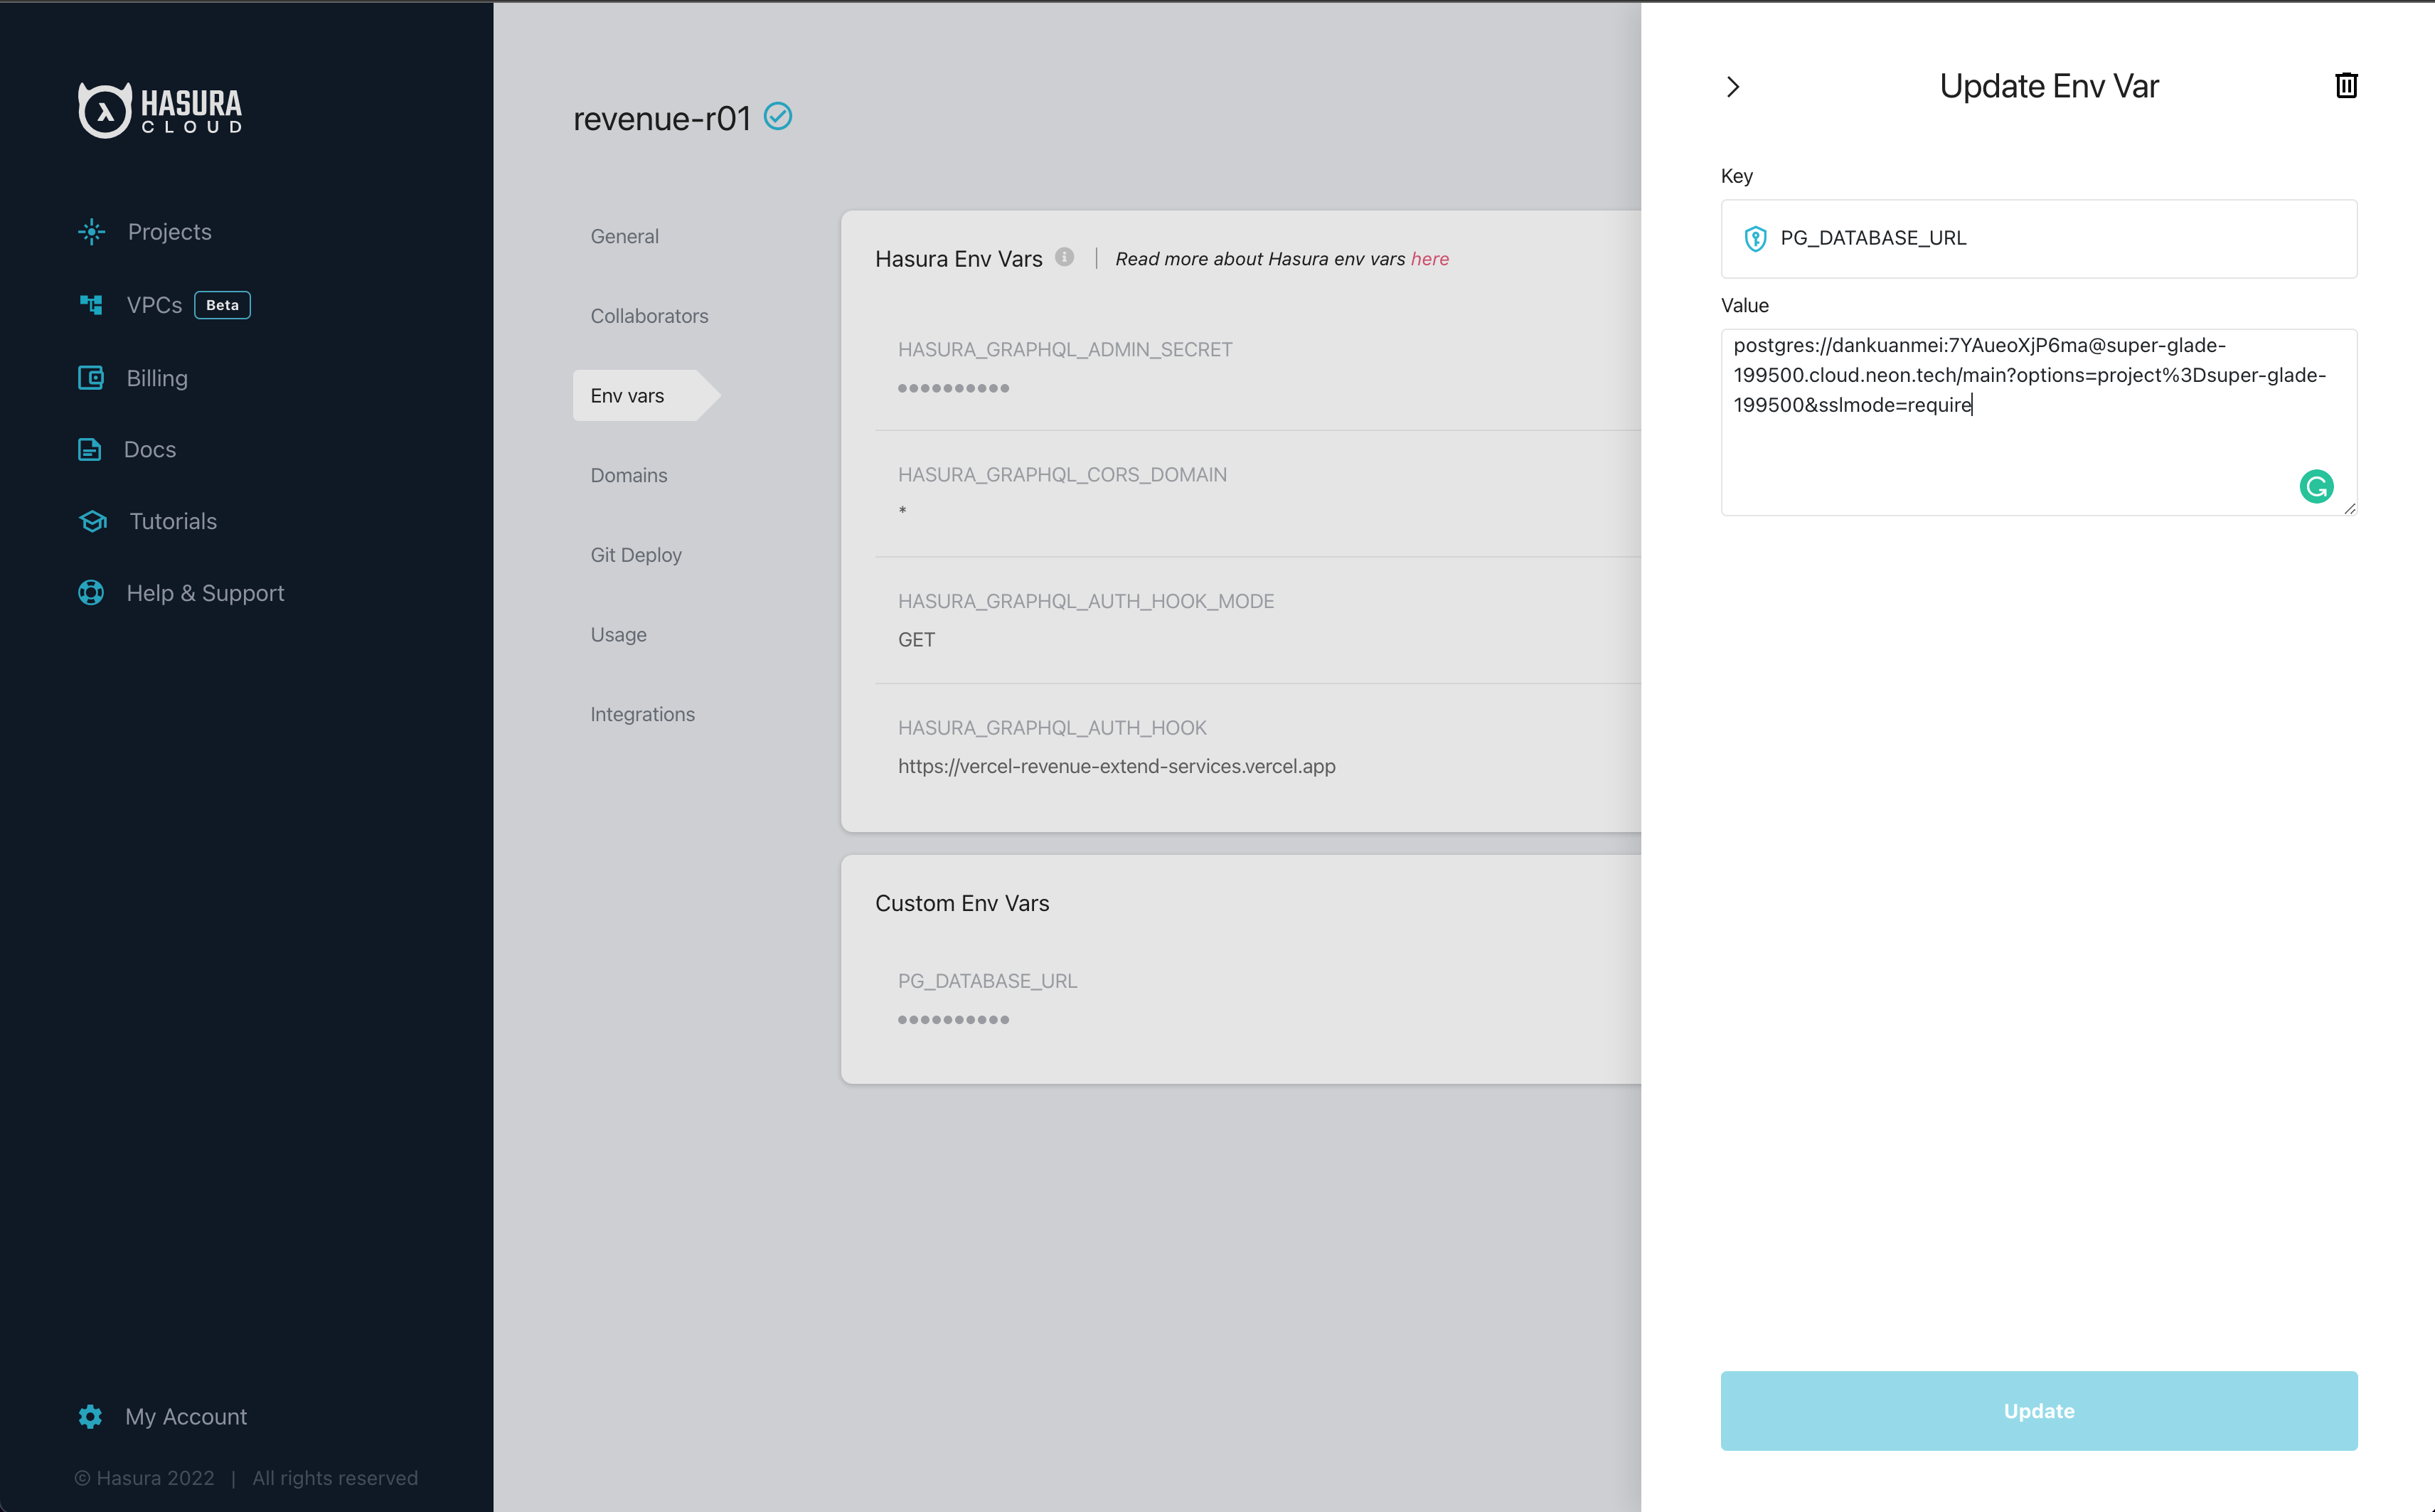
Go to Hasura Cloud page, click "setting" button project, open “Env vars”. You can see “PG_DATABASE_URL”. Click the copy button, and you can get database information.
Open file dbexport.pgsql, replace all “dankuanmei” to your database username.
And import dbexport.pgsql file to Hasura database (you can use DBeaver)
And update new database url with “PG_DATABASE_URL” value.
3. Config Metadata
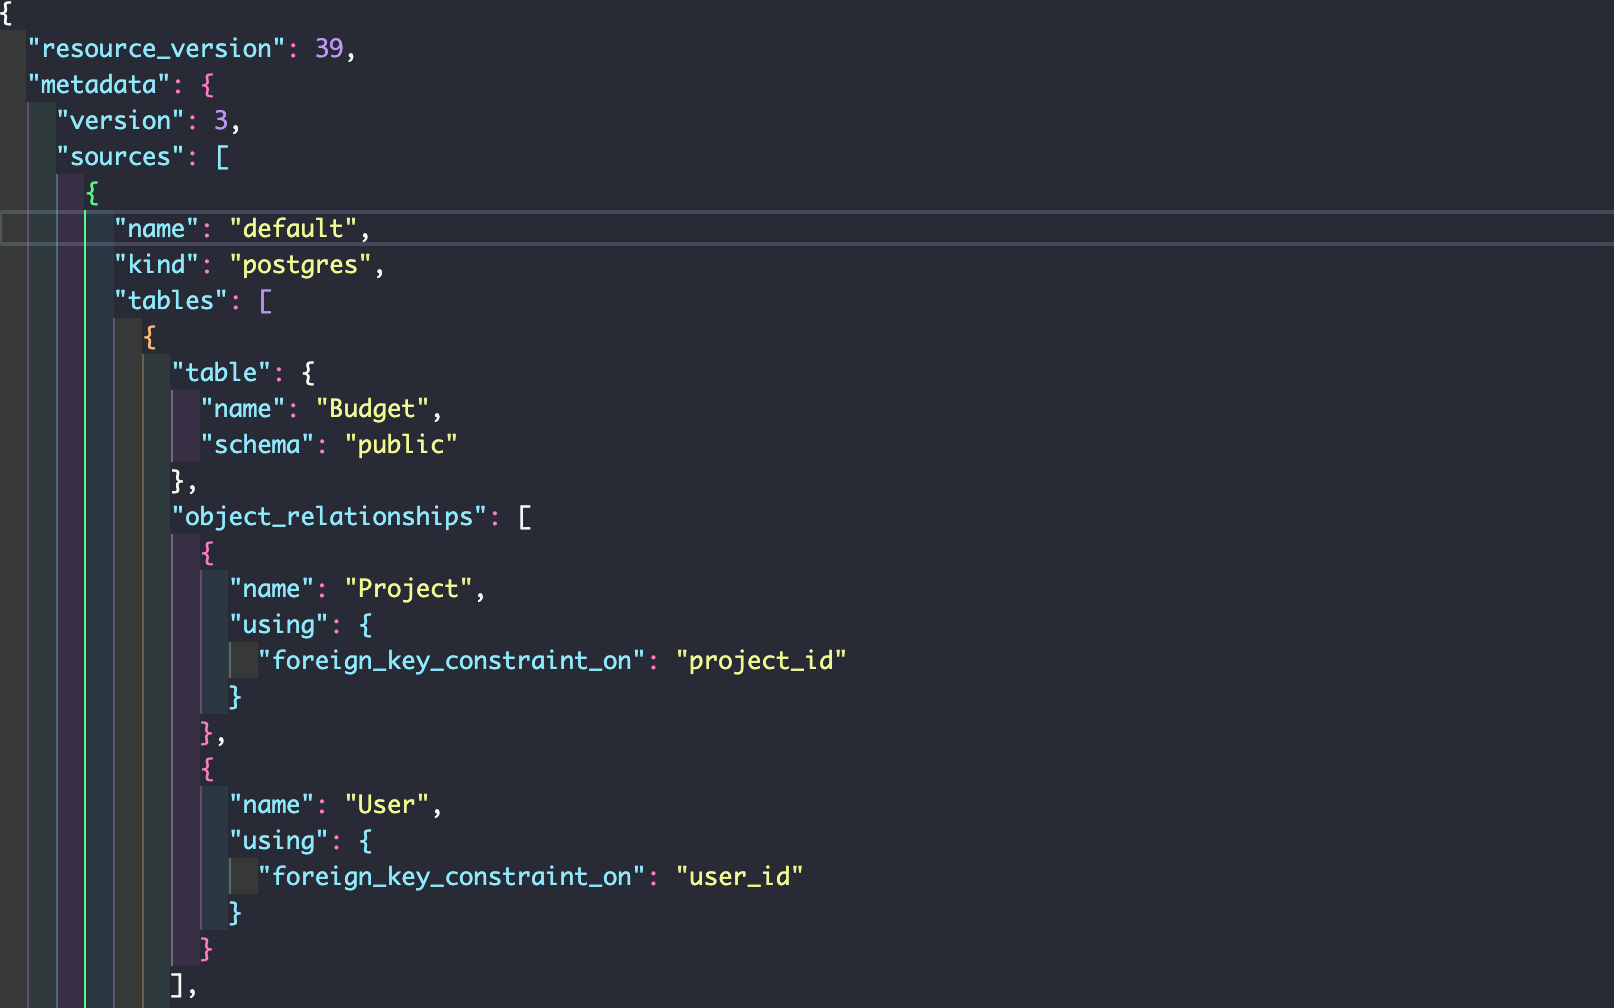
After import database finish, open “metadata.json” file go to bottom, update new database url with PG_DATABASE_URL value.
Remember if you change “Database Display Name” rename database "name": "default" also.
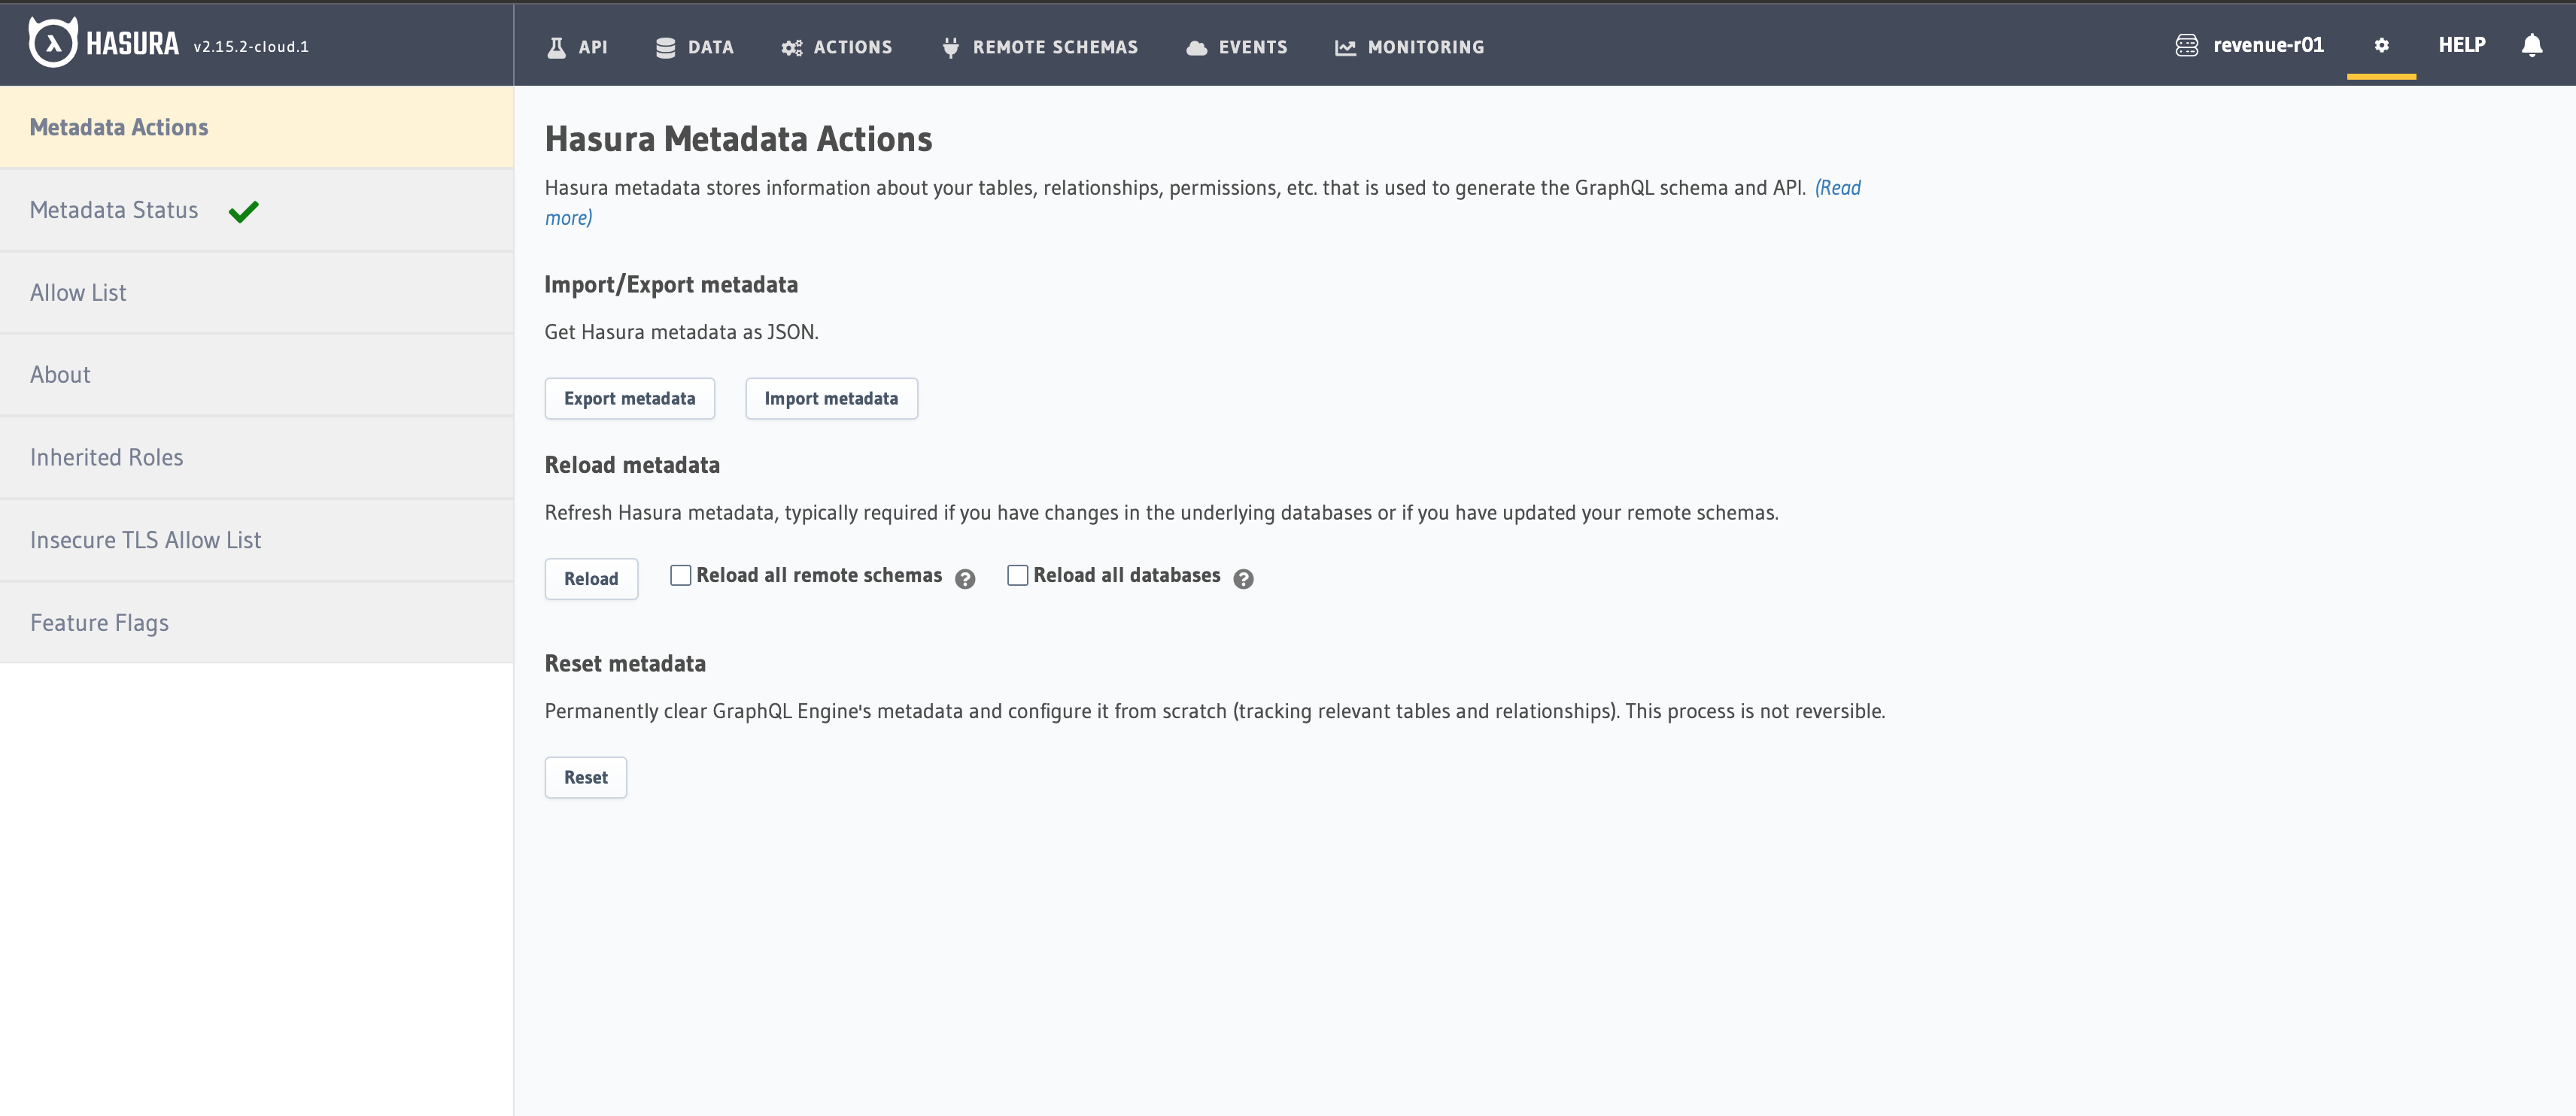
open Hasura config page, in Hasura Metadata Actions, import “metadata.json” file.
4. Config Vercel and deploy server app
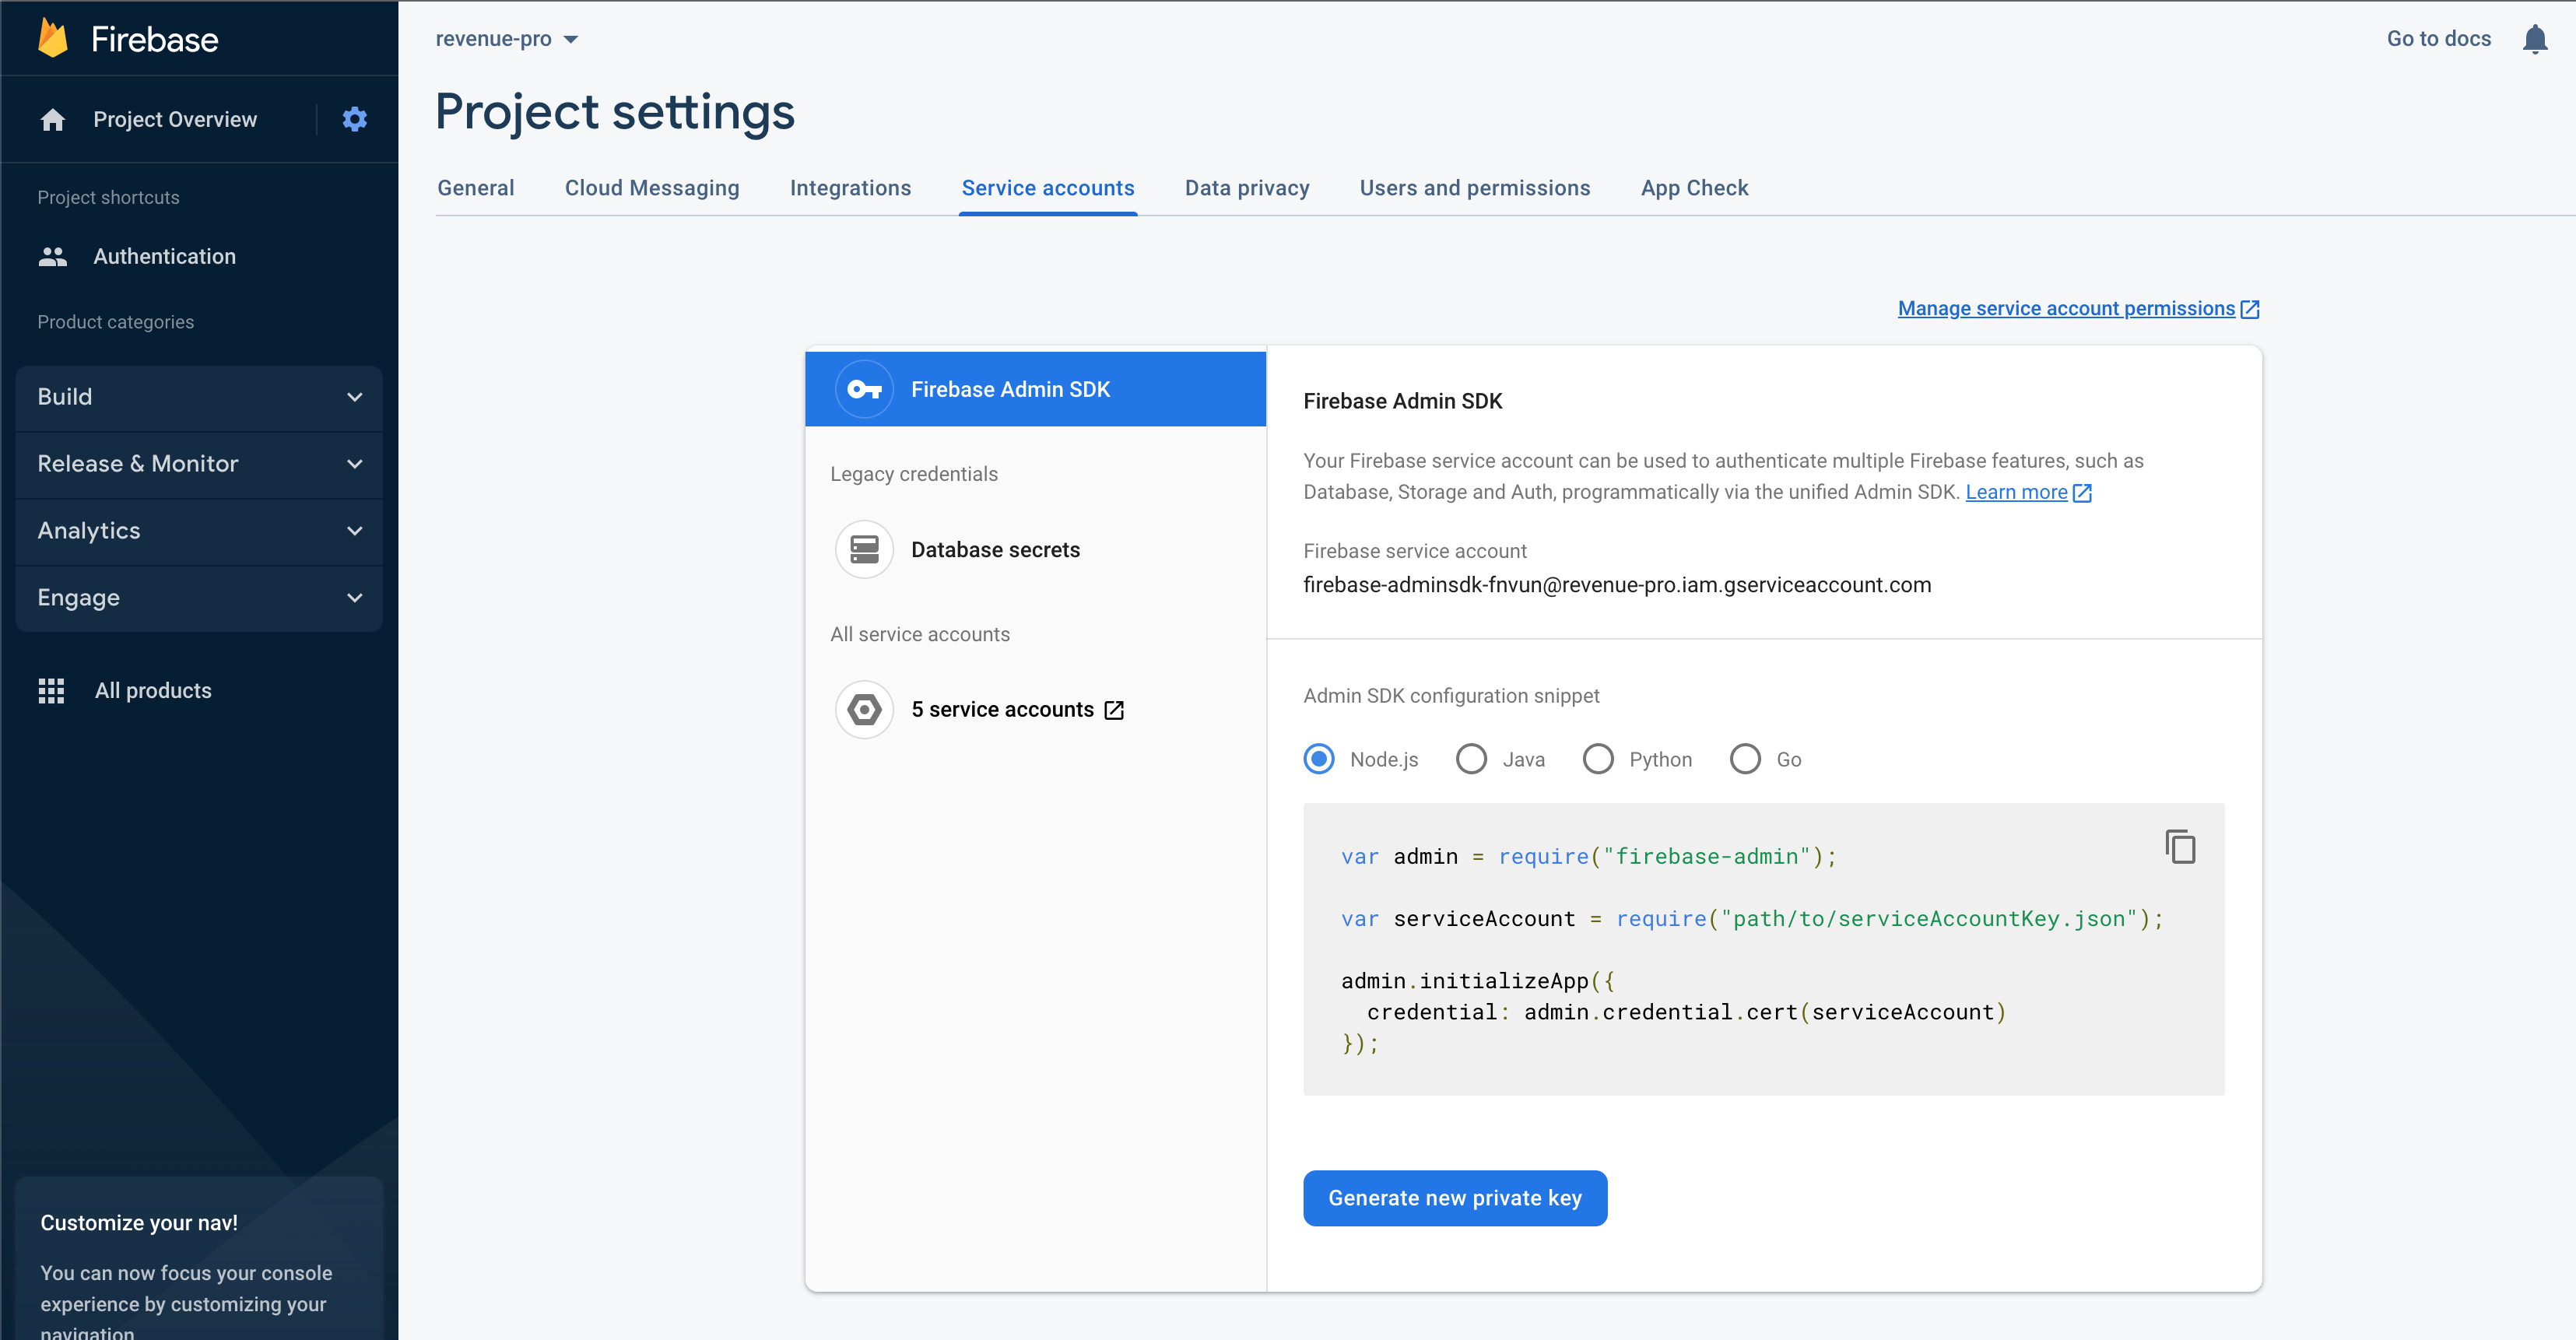
Go to Firebase Project settings > Service accounts, then click “generate new private key”, rename file to “serviceAccountKey.json”, copy it to “revenues-extend-services” source code.

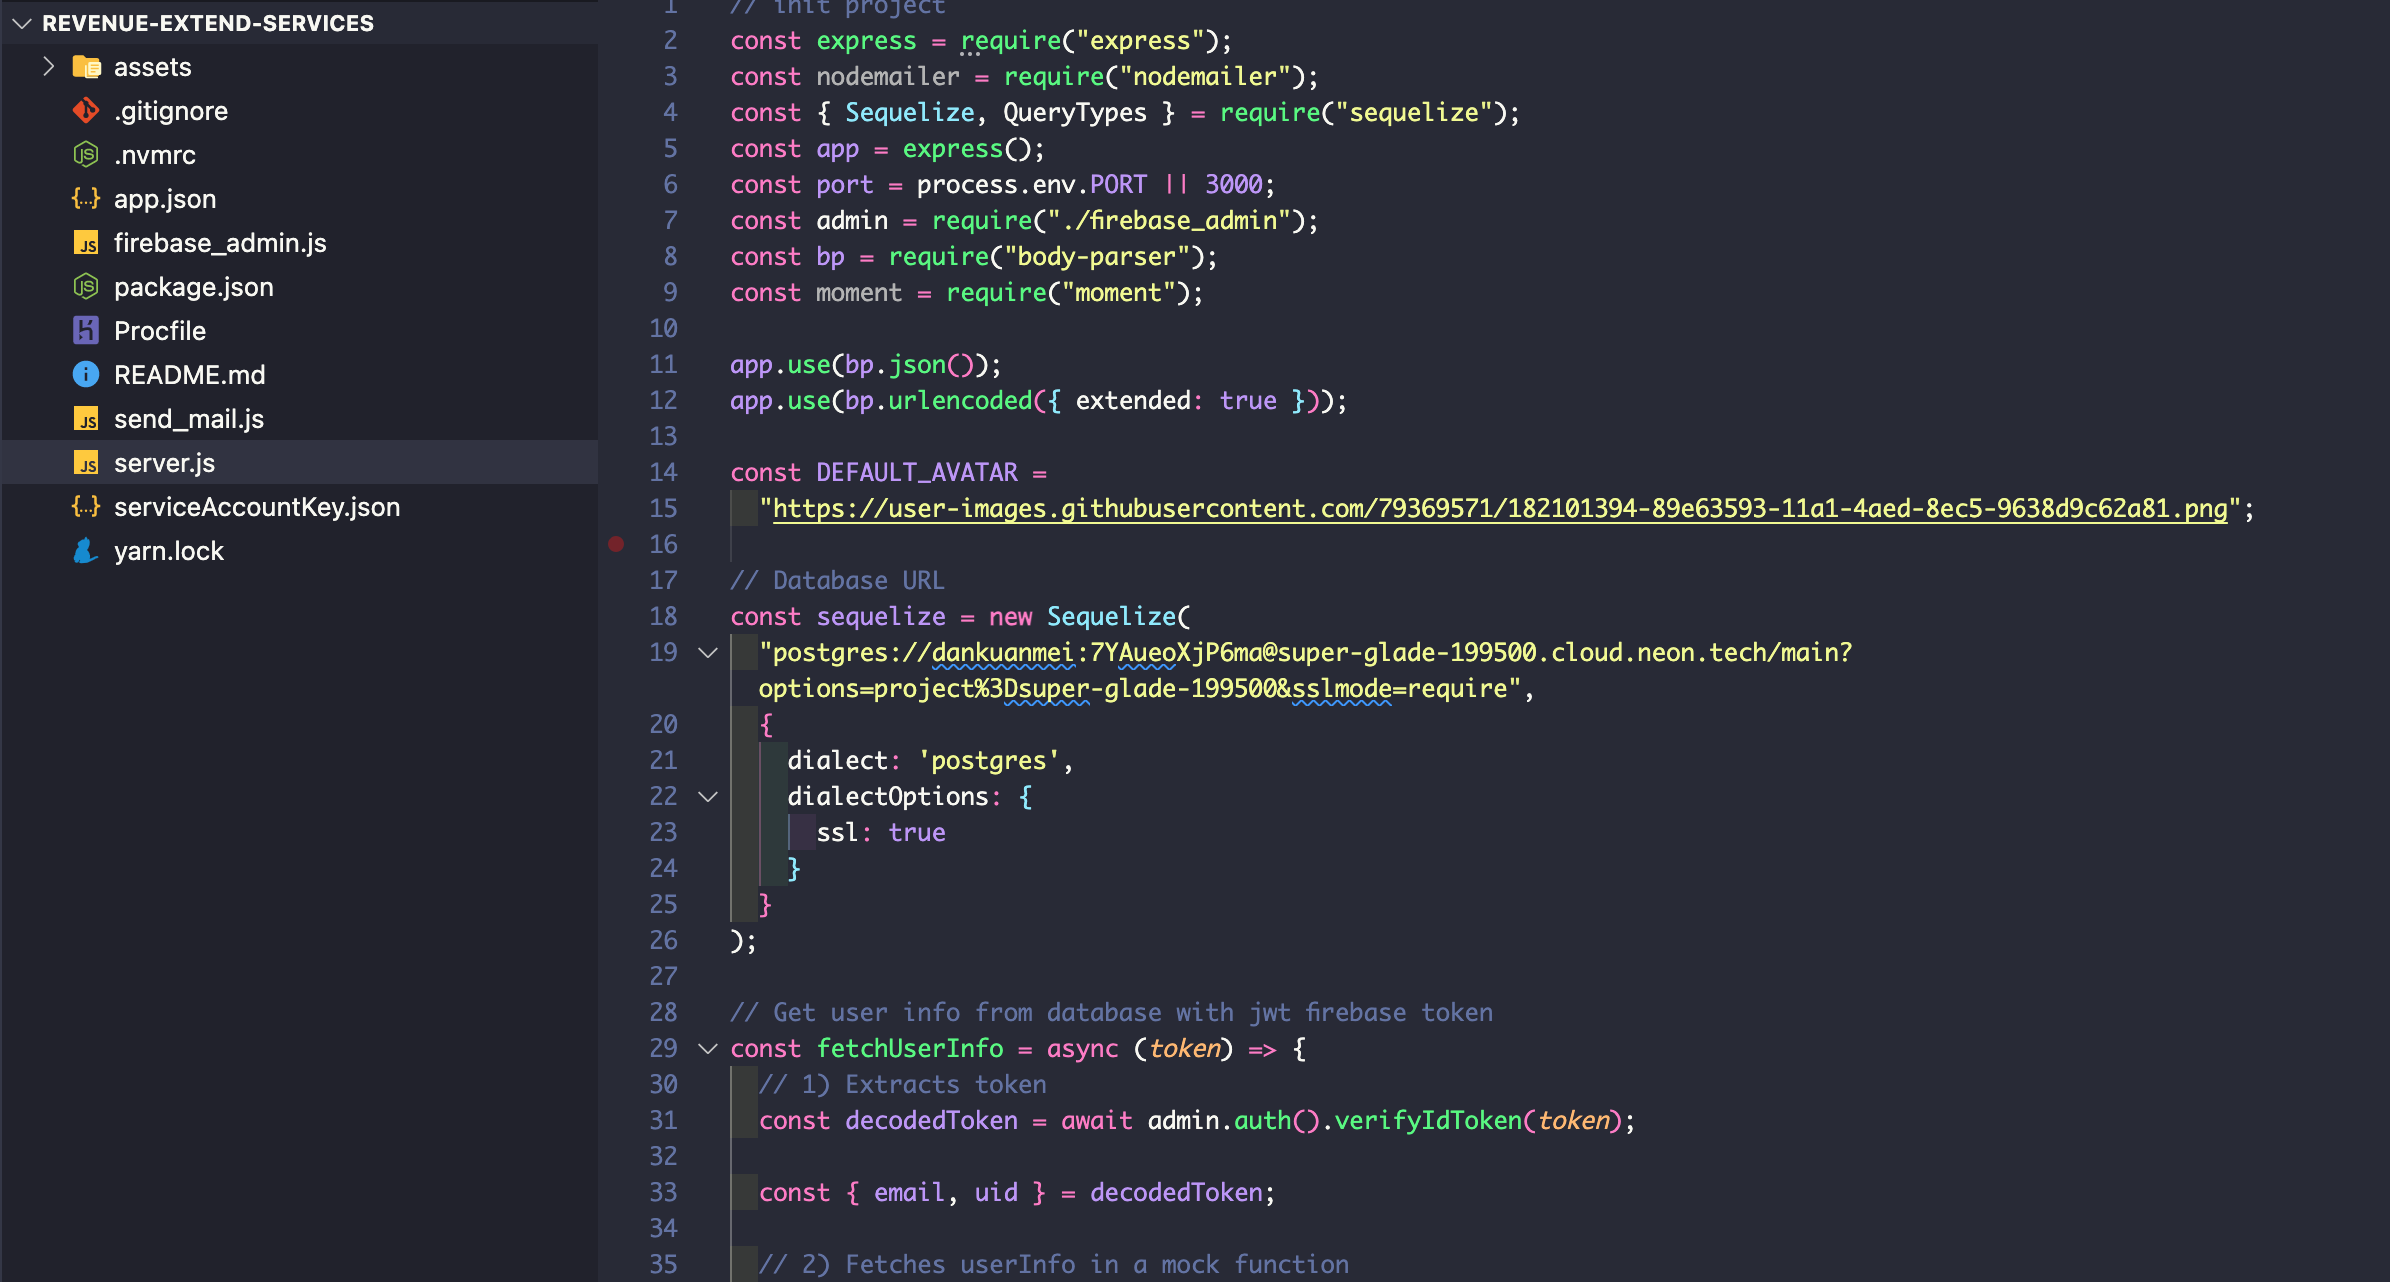
Open “server.js” file in “revenues-extend-services”, update “Database URL”.
Create a new github repository, push “revenues-extend-services” source code to that github repository.
Then create a Vercel project and connect it with the github repository,
Remember to configure require nodejs version to 14.x.
When deploy complete copy link domain “DOMAINS” > go to hasura project settings > Add “New Env Var” with “key” : “HASURA_GRAPHQL_AUTH_HOOK”

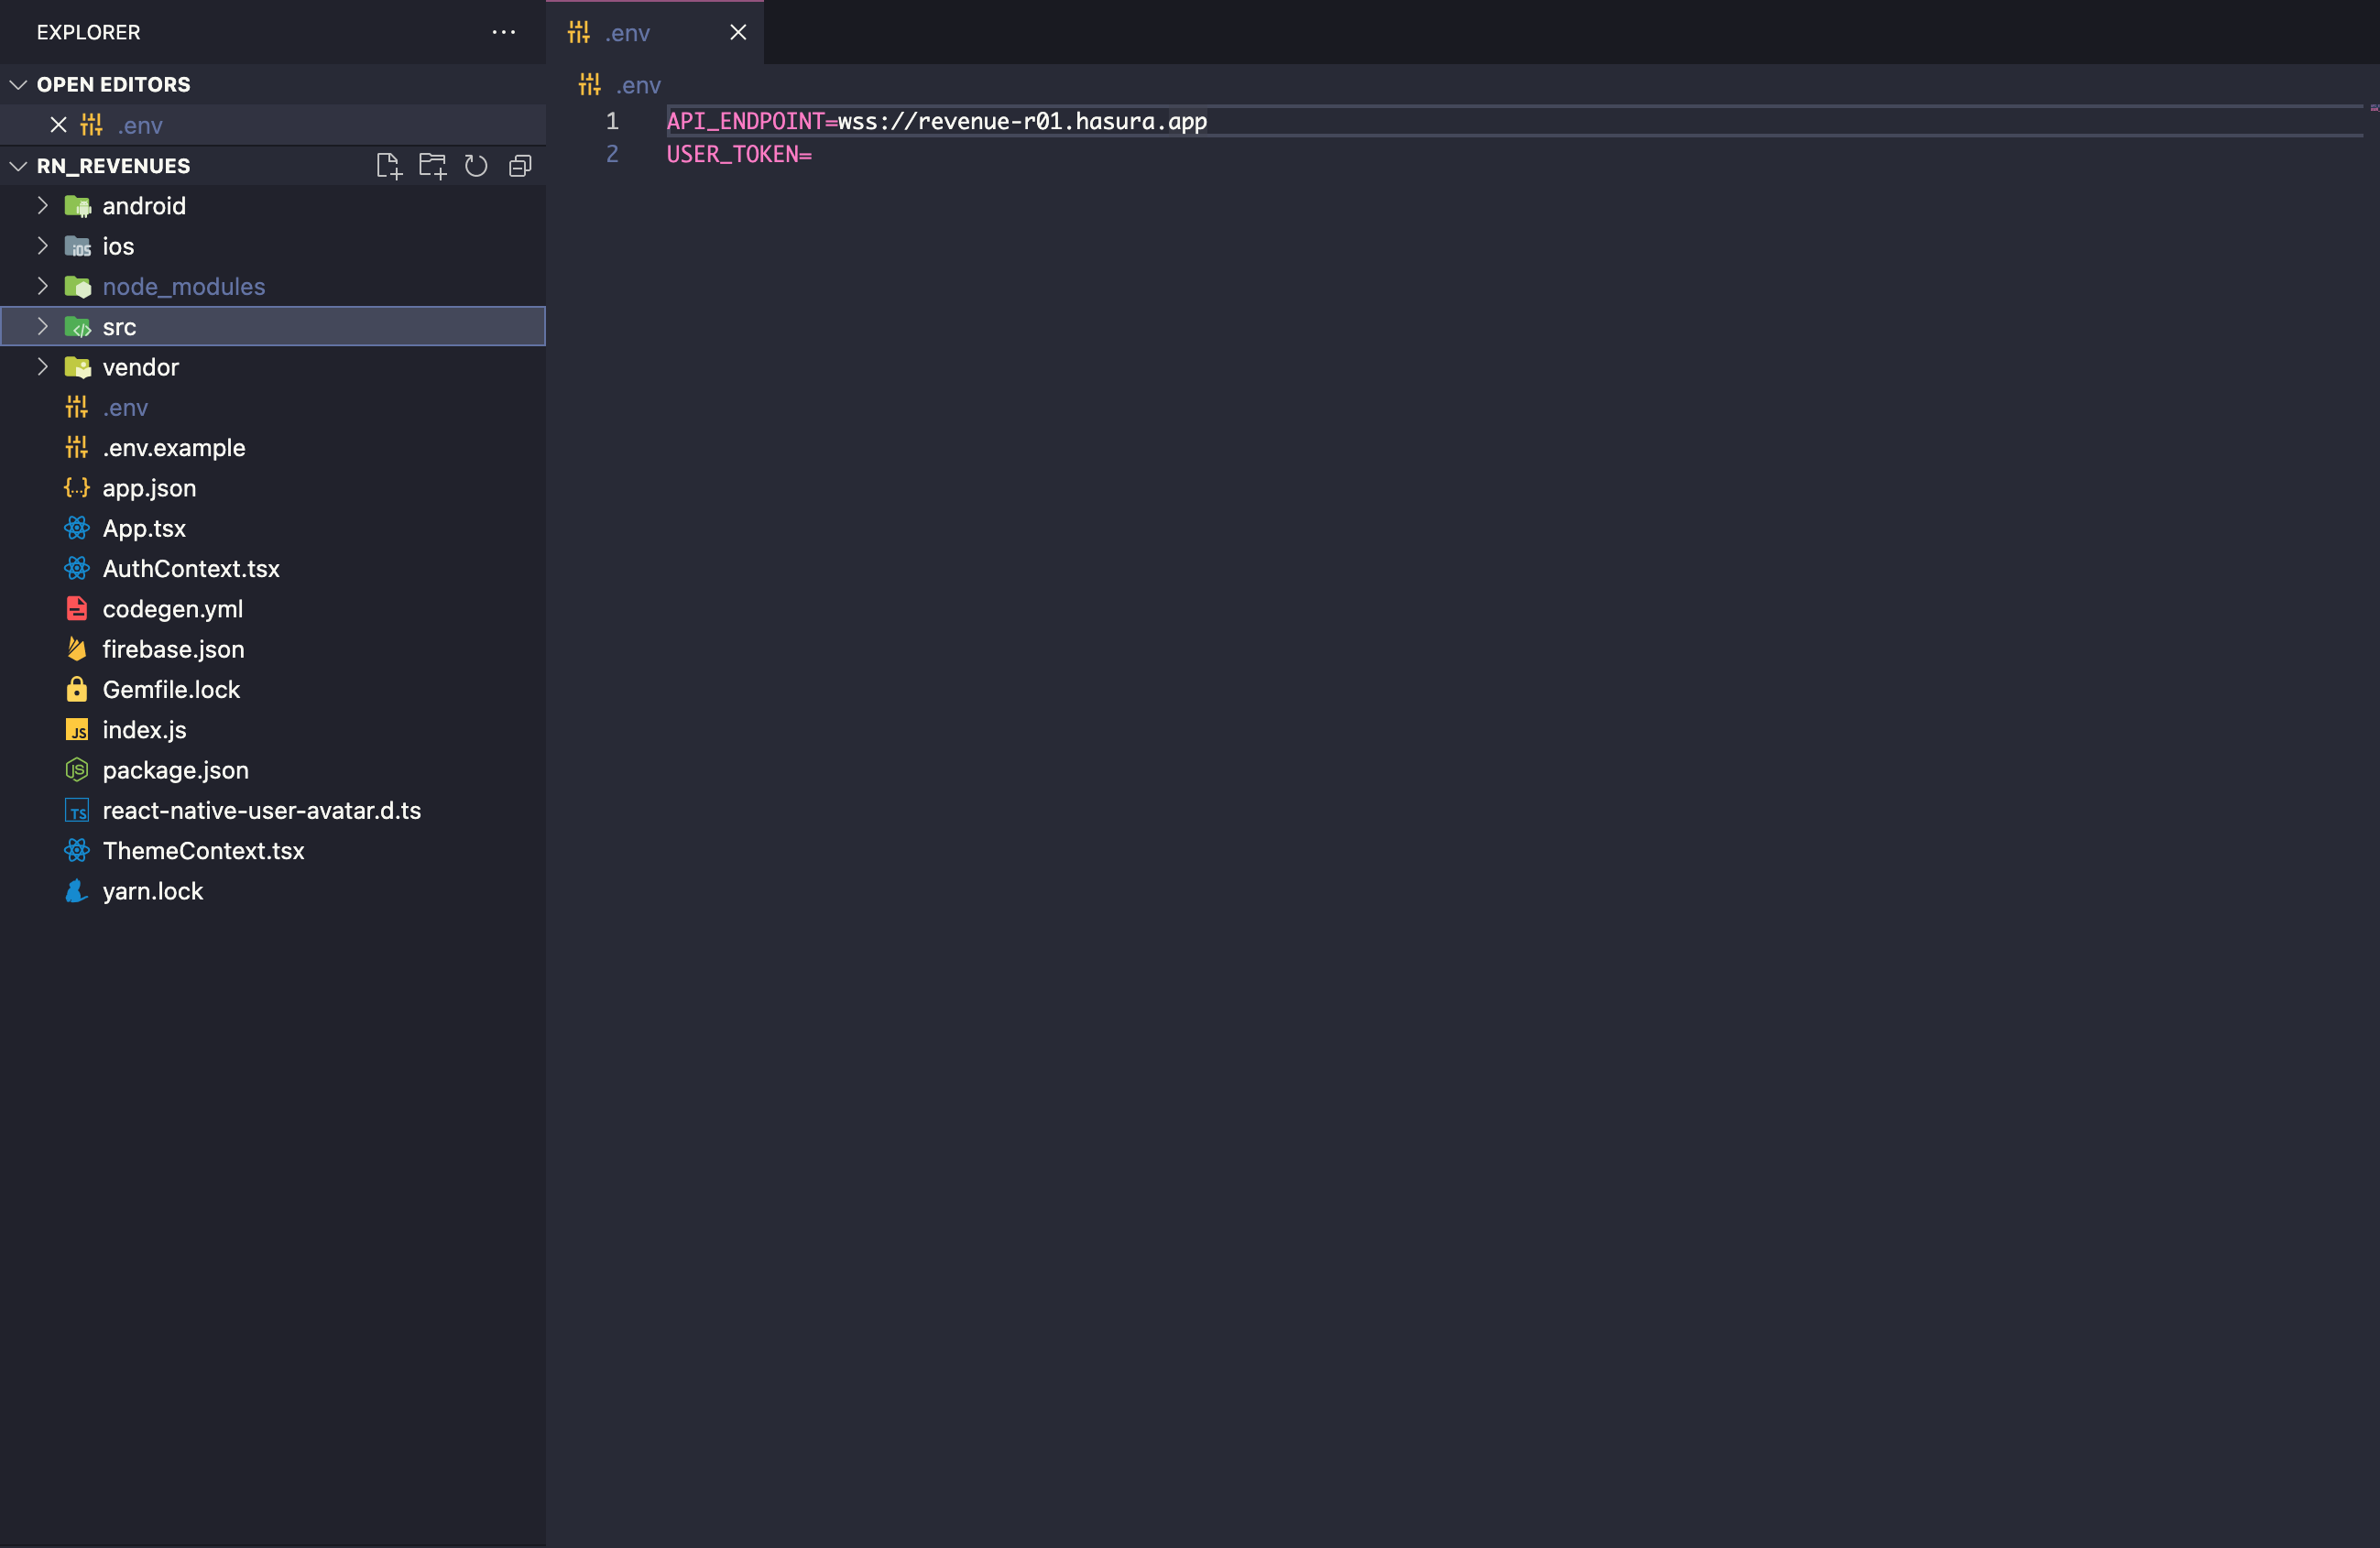
5. Config Api Endpoint
Finally, go to project app source code create file “.env” follow file “.env.example”, then replace “API_ENDPOINT” to your "GraphQL API" endpoint